Can You Put a Roasting Pan on the Stove
Many home cooks have struggled with figuring out whether their roasting pan can go on the stove. You’re not alone—it’s a common question, especially when trying to multitask or save time.
The good news is, not all pans are created equal when it comes to stove use.
Most roasting pans are designed for oven use and aren’t safe for stovetop cooking. Using them directly on the burner can cause warping, cracking, or accidents, especially if the material isn’t stove-safe.
Typically, pans made from stainless steel or enameled cast iron can handle stovetop heat if used carefully.
To guarantee safety and longevity, it’s best to understand what your pan is made of and how to prepare it properly.
Keep exploring for detailed tips and alternatives.
Key Takeaways
- Most roasting pans aren’t designed for stovetop use, so check the manufacturer instructions before trying.
- Materials like stainless steel and enameled cast iron are safe on the stove, while aluminum and non-stick coatings usually aren’t.
- Putting heavy or uneven pans on burners can cause warping or safety issues, so handle with care.
- Always use heat-resistant mitts and make sure the pan is stable on the stove before you turn on the heat.
- For stovetop cooking, it’s better to transfer the food to something stove-safe or use proper cookware instead.
Can You Put a Roasting Pan on the Stove? A Quick Answer
If you’re wondering whether you can put a roasting pan on the stove, the quick answer is generally no. Most roasting pans aren’t designed for stovetop use, which can pose safety risks and damage your cookware.
Most roasting pans aren’t safe or suitable for stovetop use and can cause damage or accidents.
It’s essential to prioritize cooking safety and avoid placing heavy or uneven pans directly on burners. Instead, consider your kitchen setup: specialty pans are better suited for oven use or specific appliances.
Using a roasting pan on the stove can lead to warping, cracking, or even dangerous accidents. If you need to melt or prepare ingredients, opt for pots or pans made explicitly for stovetop use.
Ensuring your cookware matches the intended purpose helps prevent accidents and prolongs its lifespan. Ultimately, understanding what your roasting pan can and cannot handle keeps you safe and maintains your kitchen’s safety standards.
Always follow manufacturer instructions and use appropriate cookware for stovetop cooking.
What Is a Roasting Pan and What Materials Are They Made Of?
A roasting pan is a versatile piece of cookware mainly used for roasting meats and vegetables in the oven. It’s a key tool in any kitchen for creating flavorful meals.
Roasting pans are made from different materials, each offering unique benefits for safety and durability. Common options include stainless steel, aluminum, enameled cast iron, and non-stick coatings.
Stainless steel lasts a long time and is easy to clean. Aluminum heats up quickly and distributes heat evenly. Enameled cast iron can handle high temperatures safely and won’t rust. Non-stick coatings make cleanup simple but need gentle handling.
| Material | Heat Conductivity | Durability |
|---|---|---|
| Stainless Steel | Moderate | High |
| Aluminum | Excellent | Moderate |
| Enameled Cast Iron | Excellent | Very High |
| Non-Stick Coating | Good | Moderate |
Choosing the right material is essential because it affects your cooking safety and how long your tools last.
Which Roasting Pans Are Safe to Use on the Stovetop?
Not all roasting pans are suitable for stovetop use, but some are specifically made to withstand direct heat. Look for stainless steel or cast iron pans, as these materials are durable and safe on the stove.
Choose stainless steel or cast iron roasting pans for safe, durable stovetop cooking.
They often blend well with your kitchen aesthetics, offering a sleek, classic look that can enhance your cooking space. These pans tend to be versatile, making them easier to store and access, especially if you have limited space.
Avoid non-stick or aluminum roasting pans for stovetop cooking because they can warp or get damaged from direct heat. If you’re prioritizing functionality and style, choose a roasting pan made of heavy-duty materials.
This not only guarantees safety but also helps keep your kitchen organized. Remember, using the right pan helps prevent accidents and keeps your cooking area looking good. Always check manufacturer guidelines before placing any roasting pan directly on your stovetop.
How Do You Prepare a Roasting Pan for Stove Use?
Before you start cooking on the stove, it’s essential to thoroughly clean and season your roasting pan if necessary. Proper preparation guarantees your pan heats evenly and reduces sticking. Follow these steps:
- Wash the pan with warm, soapy water to remove any manufacturing residue.
- Dry completely to prevent rust, especially if the pan is cast iron.
- Season if needed: apply a thin layer of oil and heat on the stove to create a non-stick surface.
- Check for any cracks or damage that could compromise safety during cooking.
Using your roasting pan on the stove requires specific techniques to prevent overheating and static damage. Always observe safety precautions like using oven mitts and avoiding direct high heat on delicate materials. Proper preparation assures better heat distribution, reduces the risk of accidents, and helps you achieve delicious results from your stove-top cooking.
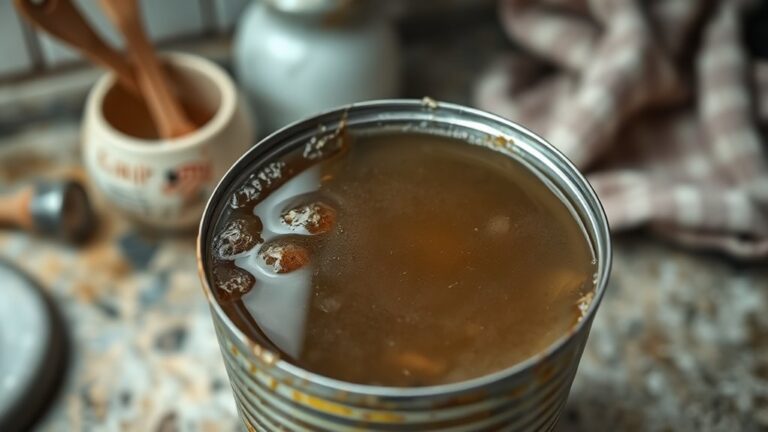
How to Deglaze and Make Gravy Using Your Roasting Pan on the Stove
Ever wonder how to turn those flavorful browned bits left in your roasting pan into a rich, delicious gravy? Start by removing the cooked meat and placing the pan on the stove over medium heat.
Pour in a splash of liquid—broth, wine, or water—and use a spatula to scrape up the browned bits, which are packed with flavor. This step is key to building depth in your gravy and maintaining your pan’s seasoning.
Here’s a quick guide:
| Step | Action |
|---|---|
| 1 | Remove meat and set aside |
| 2 | Place pan on stove and heat |
| 3 | Add deglazing liquid and scrape |
| 4 | Stir and loosen browned bits |
| 5 | Simmer until thickened |
Following these steps transforms the pan drippings into savory gravy, enriching your dish while preserving your pan’s seasoning for future use.
What Are the Risks and Pitfalls of Using a Roasting Pan on the Stove?
Using a roasting pan on the stove can be pretty tricky, especially if it’s not designed for stovetop cooking. Some pans aren’t made to handle direct heat, so they might warp or even melt if you put them on the burner. That’s definitely something you want to avoid!
You also run the risk of making a mess. Spills and splatters can happen easily, and cleaning up those baked-on bits can be a real headache. And if you’re not careful, you could end up damaging either the pan itself or your stovetop, which nobody wants to deal with. So, it’s usually best to stick to pans that are specifically made for stovetop use to stay safe and avoid any unnecessary trouble.
Material Compatibility Concerns
Not all roasting pans are suited for stove use because their materials can react poorly when directly exposed to heat. Using the wrong material can mess up your cooking techniques and even pose safety risks. Here are some key concerns to consider:
Aluminum pans may warp or discolor under direct stove heat, which can lead to uneven cooking.
Non-stick coatings can degrade or release harmful fumes if heated too high, so watch the temperature.
Cast iron pans are tough but need proper seasoning and might not fit on all burners comfortably.
Glass or ceramic pans can shatter or crack when subjected to direct heat, creating a safety hazard.
Knowing which materials are compatible helps keep your kitchen safe and prevents damage to your cookware. Always double-check if your roasting pan is meant for stove use before applying direct heat.
Potential for Spills and Messes
Even if your roasting pan is stove-safe, spills and messes are still a real concern. Hot liquids or grease can splatter easily, creating safety hazards like burns or slippery floors. These messes can also affect your stove’s maintenance, with grease buildup that can damage parts over time.
To keep things safe, stay alert and use tools like splatter screens or lids to catch spills. Wiping up drips and splashes right away helps keep your workspace clean and reduces accidents. Proper handling not only keeps you safe but also extends your stove’s lifespan and makes cleanup easier. Being careful with your roasting pan on the stove saves you time, effort, and hassle later on.
Risk of Damage or Warping
Placing a roasting pan directly on the stove can risk damage or warping, especially if it’s not designed for direct heat. Overheating can weaken the pan, causing dents or cracks. This not only harms your cookware but also creates safety hazards in the kitchen.
To avoid problems, use the right cookware for stovetop cooking. Check if a roasting pan is oven-only before putting it on the stove. Proper storage helps prevent accidental misuse and damage.
Handle pans carefully and avoid putting unnecessary stress on items that aren’t stove-safe. Being cautious helps your cookware last longer and keeps your kitchen safe.
Alternatives to Stovetop Use for Extracting Flavors From Your Roasting Pan
If you’re looking to get those delicious flavors out of your roasting pan without firing up the stovetop, don’t worry—there are some pretty simple yet effective ways to do it. One option is to deglaze the pan using the oven or broiler. It might sound a bit unusual, but it works well to loosen those tasty browned bits stuck to the bottom.
Another great method is making gravy right in the roasting pan itself. Just add some liquid—like broth or wine—and pop it back in the oven for a bit. It’s a handy trick that lets you extract all those rich flavors without risking any wear and tear on your stove or cookware. Plus, it keeps your cooking process streamlined and hassle-free!
Deglazing Without a Stove
When a stovetop isn’t available, you can still deglaze your roasting pan effectively using alternative methods. These options help you pull out rich flavors while keeping things safe and respecting your cookware.
First, try using an oven-safe dish. Pour some liquid into the hot roasting pan and transfer it to a preheated oven. Let it simmer to loosen up those flavorful bits.
Another option is the microwave method. Add liquid to the pan, cover it with microwave-safe plastic wrap, and heat in short bursts. This way, you can loosen residues without much hassle.
You can also go for sous vide. Seal your roasting pan with liquid inside a vacuum bag and submerge it in a water bath. It’s a gentle way to extract those tasty flavors.
Lastly, if you have outdoor fire or a grill, carefully place the pan near the heat source to warm it up and deglaze. Just make sure it’s stable and safe to handle.
Using Oven or Broiler
Using your oven or broiler is a great way to deglaze your roasting pan without needing the stovetop. Just place the pan under the broiler or in a hot oven, and the heat will loosen the drippings and browned bits.
This method not only boosts flavor but also reduces the risk of splatters or burns on your stove, making it safer to use. Make sure the pan is oven-safe before starting, and keep a close eye on it to avoid overheating or fires.
Making Gravy in Pan
Even without the stovetop, you can make flavorful gravy right in your roasting pan by deglazing it with liquid. This method captures all those tasty drippings and flavors.
To do it safely and effectively, keep kitchen safety and appliance compatibility in mind. Here are four options:
- Use hot water or broth to deglaze the pan, scraping up browned bits with a wooden spoon.
- Transfer the pan to a hot oven or use a compatible hotplate if stovetop use isn’t an option.
- For safety, avoid using direct flame or appliances that might damage your pan.
- Finish the gravy by simmering briefly in the pan or pouring the liquid into a saucepan if needed.
This approach guarantees flavor extraction without risking damage or safety hazards.
How to Clean and Maintain Your Roasting Pan After Stove Use
After you’ve finished cooking with your roasting pan on the stove, it’s important to clean it promptly to prevent food residue and grease buildup. Proper cleaning helps preserve the pan and keeps your kitchen safe. Start by soaking the pan in warm, soapy water to loosen stubborn bits.
Use non-abrasive scrubbers or brushes to avoid scratching surfaces. For stubborn stains or burned-on residue, make a paste with baking soda and water, then scrub gently. Avoid harsh chemicals that could damage the pan or pose health risks.
Regular cleaning also supports safe cooking practices by preventing bacteria growth. After cleaning, dry the pan thoroughly to prevent rust, especially if it’s made of metal. To keep your roasting pan in top shape, apply a light coat of oil if the manufacturer recommends it.
Proper maintenance extends the lifespan of your equipment and ensures safe, effective cooking every time.
When Should You Replace Your Roasting Pan? Signs of Wear and Compatibility
If you notice cracks or dents in your roasting pan, it’s probably time to replace it. These kinds of damage can affect how well the pan heats and might even pose safety concerns. Similarly, if the pan is warping or isn’t sitting flat anymore, that’s a good sign it’s reached the end of its lifespan.
You should also pay attention if your food isn’t cooking evenly or if you see signs of material wear, like peeling or discoloration. Sometimes, certain materials might not be suitable anymore, especially if they’re not compatible with your oven or cleaning methods. Keeping an eye on these signs will help ensure you’re cooking safely and getting the best results every time.
Visible Damage Indicators
Visible damage is a clear sign that it’s time to replace your roasting pan. Damaged pans can compromise kitchen safety and make your tools less versatile.
Keep an eye out for these signs:
- Cracks or splits in the surface, which can cause leaks or uneven heat distribution.
- Warped or uneven bottoms that affect stability and cooking performance.
- Peeling or flaking non-stick coating, which can contaminate food and pose health risks.
- Rust or corrosion, especially on metal pans, weakening the structure and compromising safety.
If you notice any of these signs, it’s best to replace your roasting pan. Using damaged cookware can be unsafe and hinder your cooking. Always prioritize safety and performance when checking your tools.
Material Compatibility Issues
Over time, the material of your roasting pan can wear down or become incompatible with certain cooking methods or ingredients, signaling it’s time to think about a replacement. Material safety is vital. If your pan shows signs of corrosion, cracks, or peeling, it may no longer be safe to use.
Also, consider heat resistance. If your pan can’t withstand high temperatures or starts warping, it’s a clear sign it’s wearing out. Some materials, like non-stick coatings, may lose their effectiveness or become hazardous when damaged.
Ensuring your pan’s material remains reliable is essential for safe, effective cooking. When you notice these issues, it’s better to replace the pan rather than risk contamination or dangerous breakdowns during use.
Warping or Uneven Heating
- Visible warping or dents that catch your eye.
- Hot spots that cause uneven cooking.
- Cracks or peeling coatings that show wear.
- Difficulty cleaning because of warped surfaces.
Ignoring these signs can put your safety at risk and lead to inefficient cooking. Replacing a damaged pan ensures safe, even heat distribution and helps your cookware last longer. Always check your roasting pan for wear, especially if you use it on the stove often.
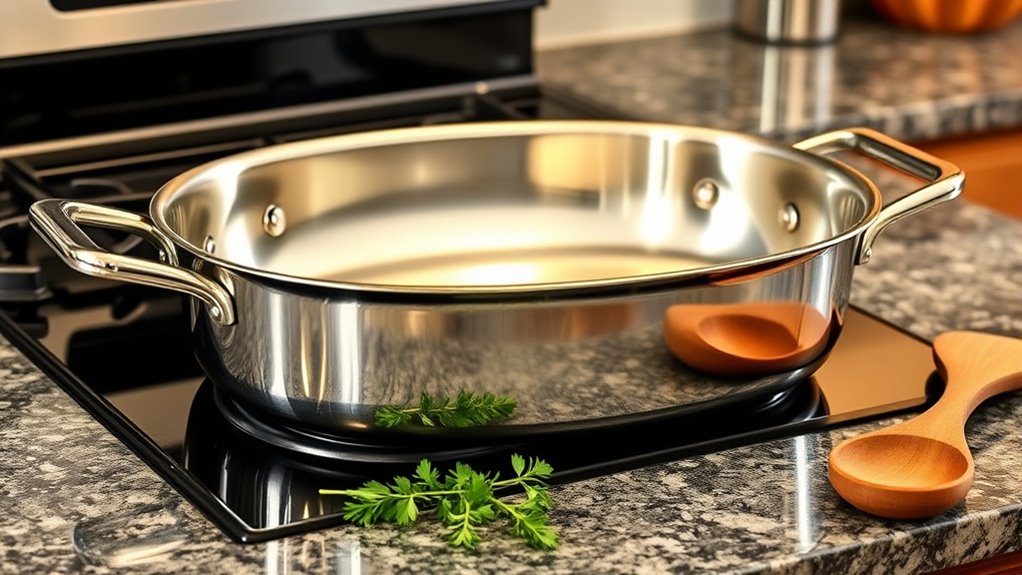
Top Tips for Safe and Effective Use of Your Roasting Pan on the Stove
Using a roasting pan on the stove can be practical, but it’s important to prioritize safety and proper technique. First, consider the pan’s construction—most roasting pans are made of heavy metal, offering excellent heat conduction and versatility.
Use medium or low heat to prevent warping and uneven heating. Always lift the pan using sturdy handles rather than sliding it, which reduces the risk of spills or burns.
When cooking, utilize different techniques like searing, sweating, or simmering depending on your recipe. To stay safe, add liquids gradually to avoid splashing or boiling over.
Be cautious with non-stick coatings, as they may not withstand direct heat on the stove. Finally, always monitor the pan while in use, and let it cool before cleaning or storing.
Following these tips helps you get the most out of your roasting pan while keeping your kitchen safe and efficient.
Frequently Asked Questions
Can All Sizes of Roasting Pans Be Used on the Stove Safely?
Not all sizes of roasting pans can be used on the stove safely. Smaller pans made of heat-conductive materials like stainless steel or cast iron are usually safe to use.
Larger or aluminum pans might warp or damage your stove. Always check the pan’s material and size before using it on the stove.
Follow stove safety tips, like avoiding overhangs and making sure the pan sits stable. If you’re unsure, it’s better to use the oven to prevent accidents or damage.
What Stove Settings Are Recommended for Using a Roasting Pan?
You should use medium or low heat settings when using a roasting pan on the stove to ensure safe cooking and prevent damage. Always check if your cookware is stove-safe, because not all roasting pans are suitable for stovetop use.
Maintain a steady flame to avoid warping or melting of the pan, and never leave it unattended while cooking. Using the right stove settings helps you cook efficiently, keeps your cookware in good shape, and keeps you safe during the process.
Is It Necessary to Use a Heat Diffuser With a Roasting Pan on the Stove?
You don’t always need a heat diffuser when using a roasting pan on the stove, but it’s highly recommended.
Recent studies show uneven heat distribution is often the main reason food burns or sticks.
A heat diffuser helps improve oven placement consistency, making sure heat is spread evenly.
It also helps prevent hot spots and protects your cookware from damage.
This makes your cooking safer and more efficient, especially if your stove runs hot or has uneven heat zones.
Can Non-Metallic Roasting Pans Be Used on the Stove?
You can’t typically use non-metallic roasting pans on the stove because materials like glass or ceramic don’t conduct heat well.
These materials lack proper heat transfer, which can lead to uneven cooking or even damage.
If you want to use a roasting pan on the stove, it’s best to stick with metal options like stainless steel or cast iron.
They transfer heat efficiently and can handle direct heat safely.
How Long Can a Roasting Pan Be Safely Used on the Stove at Once?
You should limit stove use of a roasting pan to about 10-15 minutes at a time to stay safe.
Prolonged use can cause uneven heat, warping, or damage to the pan.
Always keep an eye on the heat and don’t leave the pan unattended.
If you need to cook longer, transfer ingredients to a pot or skillet made for the stove.
This way, you’ll cook safely and effectively without risking damage or accidents.
Conclusion
So, can you put a roasting pan on the stove? It’s possible, but only with the right types of pans and proper preparation. Always make sure your pan is stovetop-safe and follow safety tips to avoid accidents or damage.
Remember, a good roasting pan can be a versatile tool, so why not make the most of it? Isn’t it great when your cookware works seamlessly from oven to stove, turning everyday cooking into a craft?