Can You Cook a Ham in a Roaster Pan
Many people struggle with finding the best way to cook a ham that’s juicy and flavorful without making a mess in the kitchen. If you’ve ever wondered whether a roaster pan is a good choice, you’re not alone.
Can You Cook a Ham in a Roaster Pan?
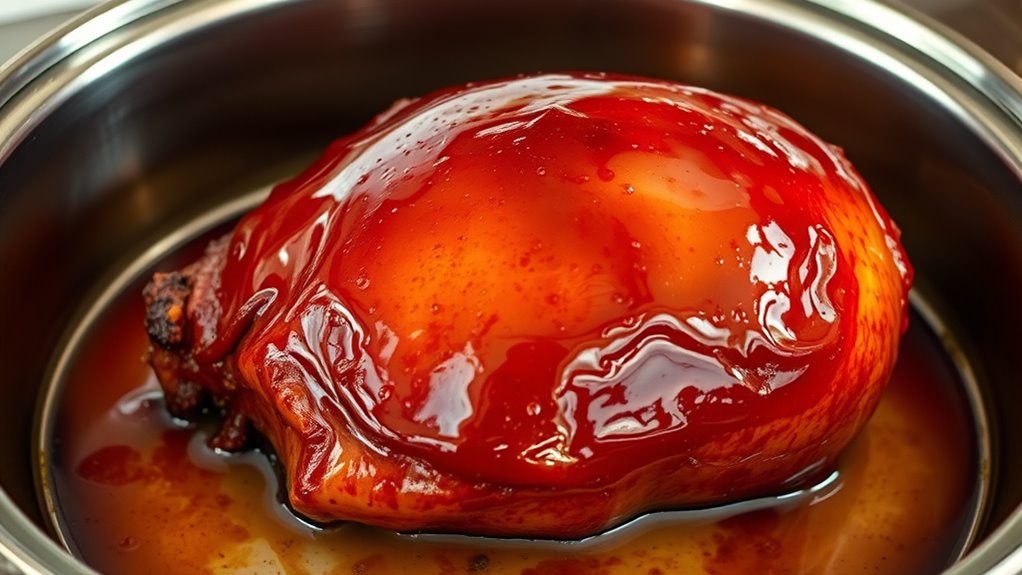
Yes, you can definitely cook a ham in a roaster pan, and it’s an excellent choice for even, juicy results. A roaster pan helps distribute heat uniformly, keeps the meat moist, and minimizes mess.
Just pick the right-sized pan, prepare your ham properly, and monitor the temperature closely.
For tips on perfecting your roast, including when to glaze and how to avoid common mistakes, keep going—you’ll find everything you need for a delicious ham.
Key Takeaways
- Yes, a roaster pan provides even heat distribution for roasting ham effectively.
- It helps retain moisture and juices, making sure the ham stays tender and flavorful.
- Choose a suitable, large enough pan with a lid or vents to control steam.
- Roasting ham in a pan makes it easy to baste and keep an eye on the internal temperature.
- Proper preparation and letting the ham rest after cooking help maximize juiciness and flavor.
Is Roasting Ham in a Pan a Good Method?
Roasting a ham in a pan is a popular and effective method because it allows you to cook the meat evenly while keeping it moist. Using the right roasting equipment, such as a sturdy pan with a lid or a roasting rack, helps preserve the ham’s natural juices.
This method improves the ham flavor by ensuring the heat surrounds the meat consistently, leading to a tender and juicy result. You’ll find that roasting in a pan is straightforward and convenient, especially if you want to control cooking time and temperature easily.
Plus, it minimizes mess compared to other methods. The pan’s design helps retain moisture and prevents the ham from drying out. With proper equipment, roasting a ham in a pan becomes a reliable way to achieve flavorful, evenly cooked results.
How to Pick the Best Roaster Pan for Your Ham
Choosing the right roaster pan really depends on what you’re looking for. Think about how durable it needs to be—materials like stainless steel or porcelain are usually good choices because they last a long time.
Also, make sure the pan is big enough to comfortably hold your entire ham. You don’t want it cramming in there! And look for a lid that has vents—that way, you can better control the moisture and avoid any messy splatters.
Having these features will make your cooking experience easier and help you get better results with your ham.
Material Matters for Durability
Since the material of your roaster pan directly impacts its durability, choosing the right one ensures it will last through many uses. Look for sturdy options like stainless steel or heavy-duty aluminized steel, which fight warping and scratches.
These materials also distribute heat evenly, making ham slicing safer and easier. When applying glaze, a solid pan won’t warp or get damaged by sticky, sugary coatings.
While non-stick coatings are convenient, they can wear out quickly under high heat. If you go this route, pick oven-safe, chip-resistant options. Overall, a well-made, durable pan saves you money and keeps its shape even after frequent use.
Prioritize quality materials for a dependable roasting experience.
Size Suitable for Quantity
Selecting the right size roaster pan ensures your ham fits comfortably, cooks evenly, and keeps splatters or spills to a minimum.
For large hams, pick a pan with enough room so it doesn’t overcrowd, which can mess with seasoning and even cooking. Small hams need a more compact pan for proper heat distribution.
Think about these factors:
- Meat size and weight
- Space needed for glaze or liquids
- Ease of handling and cleaning
- Compatibility with your oven
A well-sized pan helps you get a beautifully glazed, evenly cooked ham. It also makes slicing easier afterward.
Plus, it helps minimize drips and mess, keeping your kitchen tidy. Choosing the right size helps your ham turn out delicious, visually appealing, and perfectly cooked.
Lid and Vent Features
Have you thought about how lid and vent features can affect your ham cooking? The right lid helps trap moisture for juicier results, while vents let excess steam escape so things don’t get soggy.
A well-designed lid with adjustable vents gives you control over your cooking environment. Some lids have built-in vents, and others are fully sealed.
| Lid Features | Vent Options |
|---|---|
| Adjustable vents for moisture control | Fully vented lids for steam release |
| Tight-fitting to retain heat | Partial vents for balanced cooking |
| Transparent lids for monitoring | Manual vents to customize airflow |
| Durable, easy-to-clean material | Automatic vents for convenience |
Preparing Your Ham Before Roasting
Before you start roasting, it’s important to prepare your ham properly. First, consider how you’ve stored it; make sure it’s been kept at the right temperature to keep it fresh.
Ensure your ham is properly stored and at the right temperature for the best roasting results.
If your ham has been frozen, thaw it overnight in the fridge. Once thawed, remove it from the packaging and pat it dry with paper towels to help it brown evenly.
For the best flavor, think about a glaze or marinade that complements the ham’s saltiness. If you’re serving right away, scoring the surface in a diamond pattern will help the glaze sink in.
Also, let your ham sit at room temperature for about 30 minutes before roasting. This helps ensure it cooks evenly and comes out just right.
The Best Temperature and Cooking Time for Roast Ham
To make sure your roast ham turns out juicy and flavorful, aim for a cooking temperature of 325°F (163°C). For a fully cooked, tender ham, plan to cook it for about 15-20 minutes per pound, depending on size and whether it’s precooked.
Use a reliable meat thermometer to check for an internal temperature of 140°F (60°C) for pre-cooked ham or 145°F (63°C) for fresh ham. To enhance flavor, baste the ham periodically with a glaze or juices, adding layers of flavor intensification.
Basting keeps the ham moist and helps create a beautiful, appetizing presentation. Remember, letting the ham rest for 10-15 minutes before slicing helps retain the juices and refines presentation tips.
Keeping an eye on the temperature and timing ensures a juicy, delicious ham that’s perfectly cooked and visually appealing.
How to Roast a Ham in a Pan for Even, Juicy Results
Want to roast a ham in a pan and get that even, juicy perfection? Start by giving it a good coat of a flavorful glaze or rub to add those delicious layers of taste. Once you’ve prepped it, keep the heat steady throughout the cooking process—this helps the heat distribute evenly and prevents any dry spots.
And don’t forget, once your ham is done, let it rest for a few minutes before slicing. That little pause allows the juices to settle, making every bite moist and tender. Follow these simple steps, and you’ll be enjoying a perfectly cooked ham every time!
Prep the Ham Properly
Wondering how to guarantee your ham cooks evenly and stays juicy? Proper preparation is key. First, remove any packaging and pat the ham dry to promote even heating.
Think about your seasoning options—try a simple glaze, a spice rub, or a marinade to boost flavor. If your ham has been naturally cured, learn about ham curing techniques to see if more curing is needed before roasting.
To ensure even cooking, score the fat in a diamond pattern for better flavor infusion. Bring the ham to room temperature before roasting.
You can also use a dry rub or marinade to add moisture, helping keep the ham juicy. Wrap the ham loosely in foil if you want to retain moisture and prevent over-browning.
Following these steps gives you a strong foundation for a juicy, perfectly roasted ham.
Maintain Consistent Temperature
Maintaining a consistent temperature throughout the roasting process guarantees your ham cooks evenly and stays juicy. To do this, set your oven or roaster pan to a steady temperature, usually around 325°F (163°C).
Avoid opening the lid or door too often, as it causes temperature fluctuations and can dry out the meat. Consider marinating options beforehand; steady heat helps flavors seep in evenly.
A well-cooked, evenly heated ham looks more appetizing and keeps its juices. Use a reliable oven thermometer to monitor the temperature closely. Regularity ensures your ham remains tender and flavorful from edge to center, preventing undercooking or overcooking, resulting in a beautiful, juicy final dish.
Rest Before Serving
Allowing the ham to rest after roasting is essential for locking in its juices and guaranteeing each slice is tender and flavorful. Resting time lets the juices redistribute, resulting in a moist, delicious centerpiece for your holiday traditions.
During this period, the meat remains warm and juicy, perfect for serving. Consider these tips:
- Cover with foil loosely to keep it warm
- Rest for at least 15-20 minutes
- Use this time to prepare appetizer pairings or garnishes
- Slice carefully to maintain perfect presentation
This pause lifts your holiday meal, making it ideal for serving alongside festive sides and appetizers. Taking a moment to rest your ham ensures every bite is flavorful, tender, and impresses guests. It’s a simple step that boosts your overall feast.
Should You Cover the Ham During Roasting?
Whether you should cover the ham during roasting depends on what you want to achieve. Covering helps keep it moist, so your slices come out juicy. Uncovering lets the surface caramelize and gives a crispy, browned exterior.
If you’re aiming for a flavorful, tender ham, it’s best to cover it with foil during the first part of roasting. This preserves the seasonings and prevents it from drying out. You can then uncover it in the last 30-45 minutes for a glossier finish and better texture.
Here’s a quick guide:
| Cover During Roasting | Uncover for Final | Best for |
|---|---|---|
| Keeps moisture | Crispy surface | Crusty exterior and glaze |
| Retains juices | Browning | Better flavor and color |
| Prevents drying out | Develops caramelization | Enhanced texture and appearance |
| Suitable for seasonings | Not ideal if glazed early | Tenderness and flavor |
When and How to Apply Glazes for Maximum Flavor
To make your glazed ham taste even better, timing and technique really matter. Apply the glaze during the last 20 to 30 minutes of roasting to avoid burning and let the flavors really develop. Brush a thin coat onto the hot ham, then reapply every 10 minutes for a shiny, flavorful finish.
Keeping the ham warm and avoiding thick layers help prevent uneven caramelization. For best results, start with a slightly undercooked ham so it absorbs the glaze better. Use a brush for an even spread of the glaze across the entire surface.
It’s better to do multiple thin coats rather than just one thick layer. Let each coat sit for a few minutes before adding the next. Once done, give the glaze some time to set before slicing and serving.
Troubleshooting Common Problems When Roasting Ham
When you’re roasting ham, it’s pretty common to run into some issues like dry meat, uneven cooking, or too much fat. Don’t worry, though – just a few simple tricks can really help you get better results. Let’s walk through some easy tips to tackle each of these problems so your ham turns out just right.
Overcoming Dryness Issues
Dryness is a common issue when roasting ham, but you can prevent it by paying attention to a few key techniques. To keep your ham juicy, choose seasoning options like brines or glazes that include moisture. These help lock in flavor and stop the ham from drying out.
Resting the ham properly after roasting allows the juices to redistribute, which minimizes dryness. Using the right carving techniques also matters—you want to cut along the grain with a sharp knife to keep the meat tender and juicy.
Here are some tips for success: Cover the ham with foil during the last stages of roasting, and apply a flavorful glaze or marinade to lock in moisture. Using a meat thermometer helps avoid overcooking and drying out the ham.
Preventing Uneven Cooking
Uneven cooking is a common challenge that can turn a perfectly prepared ham into a disappointment. To prevent this, focus on choosing a ham with a uniform shape and size for even heat distribution.
Incorporate seasoning techniques that promote consistent flavor, like applying a balanced layer of glaze or rub. Before roasting, let the ham sit at room temperature to help it cook evenly.
Adjust your roaster pan’s position and use a meat thermometer to monitor the internal temperature. This can prevent overcooking or undercooking. Cover the ham loosely with foil if certain areas cook faster.
Consider rotating the ham occasionally during cooking. By paying attention to ham selection and using thoughtful seasoning techniques, you’ll get a more uniform and delicious result every time.
Managing Excess Fat
Start by trimming any visible fat before roasting. Baste the ham with spicy marinades, which can help render out the fat and boost flavor.
If you’re going for vegetarian options, pick plant-based alternatives that need less fat and fit different diets. Use a rack in your roaster pan to lift the ham—this lets fat drip away during cooking.
Keep an eye on the ham as it cooks, skimming off any excess drippings when needed. Proper fat management keeps your ham moist without getting greasy, giving you a delicious, well-balanced dish.
Final Tips for Juicy, Perfectly Cooked Ham
To achieve a juicy, perfectly cooked ham, keeping an eye on the internal temperature and not overdoing it is key. Use a reliable meat thermometer and aim for about 140°F if you’re working with pre-cooked ham.
Once you take the ham out of the roaster, let it rest for 15-20 minutes. This helps the juices settle, so your slices stay moist and tender.
Storing the ham properly before cooking is important to keep it fresh. Keep it refrigerated until you’re ready to cook. When slicing, use a sharp knife and cut against the grain for even, easy servings.
For leftovers, store slices in airtight containers in the fridge and try to eat them within a few days to keep everything fresh. Reheat gently to prevent drying out—slow warming helps keep the moisture in.
Following these tips will help your ham stay flavorful, juicy, and tender from oven to table. It makes every bite satisfying!
Frequently Asked Questions About Roasting Ham in a Pan
When roasting a ham in a pan, questions often come up about the best techniques, timing, and safety tips. To guarantee success, use proper cooking methods and focus on kitchen safety.
For starters, always preheat your roaster to the right temperature. This helps ensure even heat distribution and better results. Using a meat thermometer is also key—check the internal temperature so you don’t overcook the ham.
Covering the ham with foil during roasting is a good idea. It keeps the meat moist and prevents splatters in your oven. Keeping your workspace clean is just as important—this helps avoid cross-contamination and keeps you safe.
These tips help you get a tender, juicy ham while reducing any risks. Remember, handling raw meat with clean utensils and washing your hands regularly are crucial parts of kitchen safety.
Frequently Asked Questions
Can I Cook a Ham Without Thawing It First?
Yes, you can cook a ham without thawing it first, but you’ll need to adjust your process a bit.
Use a roaster pan since it’s versatile and great for cooking directly from frozen.
Keep in mind, the cooking time will be about 50% longer than if the ham were thawed.
Make sure to check the internal temperature, aiming for 145°F for safety.
This method works well if you’re patient and plan ahead.
How Do I Determine the Ham’s Internal Temperature Accurately?
Imagine a thermometer, like a tiny detective, peeking into your ham’s heart. Insert it into the thickest part, avoiding the bone. When it reads 140°F, you’re good to go.
Let the ham rest before glazing or carving so the juices stay in. Use proper carving techniques and slice against the grain for tender, delicious slices.
This way, you serve perfectly cooked, safe ham every time.
Is It Safe to Cook a Ham Overnight in a Roaster?
Yes, it’s safe to cook a ham overnight in a roaster, especially if you set it to a slow cooking temperature, usually around 200°F. This method helps the flavors infuse and makes the meat tender over time.
Just make sure you keep the temperature steady and use a food thermometer to check that the ham reaches a safe internal temperature of 145°F.
Always follow food safety guidelines to prevent any risk.
What Are the Best Types of Hams for Roasting in a Pan?
Think of your ham as a blank canvas ready for flavor. For roasting, choose a pre-cooked, bone-in or boneless ham for juicy results.
These cuts soak up your ham glaze beautifully. When planning your cooking time, follow the package directions carefully and adjust for size.
The best hams for roasting in a pan help retain moisture and flavor. They make your meal a savory masterpiece you’ll be proud to serve.
Can I Reuse the Drippings From the Roaster for Gravy?
Yes, you can reuse the drippings from the roaster for gravy. Just start by straining the drippings to get rid of excess fat and bits.
Use basting techniques to boost the flavor, and if you’re not using the drippings right away, store them in a sealed container.
When you’re ready to make gravy, simmer the drippings and add thickening agents like flour or cornstarch to get that rich, smooth gravy you want.
Storing the drippings properly will help ensure your gravy turns out flavorful and silky.
Conclusion
So yes, you can absolutely cook a ham in a roaster pan, turning it into a mouthwatering masterpiece!
With the right prep, temperature, and patience, you’ll create a juicy, flavorful dish that might even make seasoned chefs jealous.
Don’t settle for anything less—your perfectly roasted ham is just a pan away.
Cherish the process, follow the tips, and watch your meal become nothing short of legendary!