How to Cook Canned Corned Beef Hash Crispy in 10 Steps
Many people love corned beef hash for a hearty breakfast, but getting it crispy can be a challenge. If you’ve ever ended up with soggy or unevenly cooked hash, you’re not alone. Achieving that perfect golden crunch is easier than you think with a few simple tips.
To make canned corned beef hash crispy, start by choosing high-quality, meat-rich cans with simple ingredients. Pat the hash dry to remove excess moisture and cook in a hot, heavy skillet over medium heat.
Spread the hash evenly, pressing down for better contact, and wait until the edges turn golden brown before flipping carefully. Keep the layer thin for crispiness and avoid overcrowding the pan.
Troubleshoot by adjusting the heat or pressing down to help it brown better. If it’s browning too quickly, turn down the heat slightly. For more tips, discover ways to improve flavor and perfect your technique.
Key Takeaways
- Choose high-quality canned corned beef hash that’s meat-rich and has minimal fillers. This helps it cook crispier and taste better.
- Pat the hash dry to get rid of excess liquid. Then spread it evenly in a preheated, oiled cast-iron or heavy skillet.
- Cook on medium heat without stirring. Let the bottom turn golden and crispy before flipping it over.
- Carefully flip the hash in one smooth motion, then press it down to form crispy, even layers.
- To reheat leftovers, use a hot skillet and press down on the hash. This helps restore the crunch and keeps it from getting soggy.
How to Choose Canned Corned Beef Hash for Crispy Results
When selecting canned corned beef hash, look for varieties with a higher meat content and minimal fillers. The canning process varies among brands, which can affect both the flavor and texture.
Find options where the meat dominates the ingredient list, as that’s usually a sign of better quality. Since many cans have fillers or preservatives, choosing those with straightforward ingredients helps ensure a more authentic flavor and better nutrition.
Higher-quality hashes often go through less processing, so they keep more of the meat’s natural nutrients. This makes your meal more wholesome and satisfying.
Check the label for details on the canning process—some brands use gentler techniques that preserve more nutrients. The nutritional value matters because it impacts the energy and health benefits of your dish.
A well-chosen canned corned beef hash will give you richer flavor, better texture, and a crispier finish when cooked right.
Preparing Your Pan and Ingredients for Perfect Crispy Hash
To achieve the perfect crispy corned beef hash, start by properly preparing your pan and ingredients. Use a heavy skillet or cast-iron pan for even heat distribution, which is essential for crisping the hash.
Before adding anything, heat the pan over medium heat and add a small amount of oil, like vegetable or canola. This helps prevent sticking, and make sure the oil coats the surface evenly.
When the pan is hot, add your corned beef hash and gently press it down with a spatula. This technique boosts the cooking process and promotes a crispy crust.
Properly prepared ingredients are key. Ensure your canned beef is well-drained to avoid excess moisture, which can stop the hash from crisping up properly.
Think about flavor pairing—adding a splash of hot sauce or a pinch of paprika can really enhance the taste.
How to Properly Heat and Spread the Hash in the Pan
Once you add the corned beef hash to the hot pan, immediately spread it out into an even layer using a spatula or the back of a spoon. This helps ensure it heats evenly and gets crispy.
As you spread the hash, remember that thinner layers crisp up more easily. Consider how thick you want it for the crispy texture you’re aiming for.
Crispy hash pairs really well with fried eggs or toast. If you need to make substitutions, try using turkey sausage instead of beef or add diced potatoes for extra crunch.
While spreading, keep an eye on the heat. If it’s too high, the bottom might burn; too low, and you won’t get that crispy texture. Letting it cook undisturbed for a few minutes helps develop a golden crust.
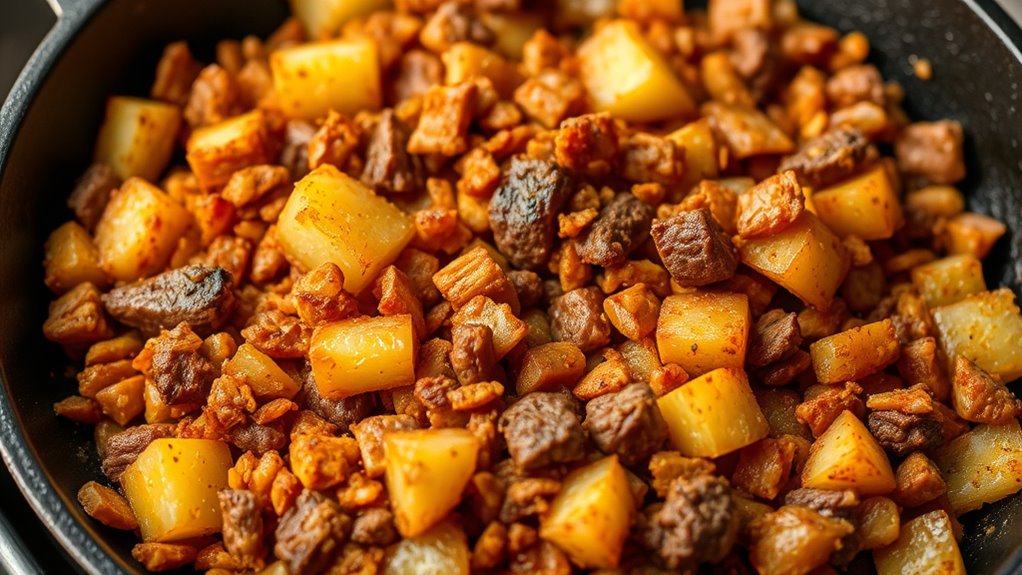
Why Layer Thickness Affects Crispiness and How to Get It Right
Layer thickness plays a crucial role in achieving that perfect crispy texture because it directly influences how evenly the heat penetrates and how quickly the surface browns.
If your hash layer is too thick, the center will stay soft while the edges become crispy, resulting in uneven texture.
Conversely, too thin a layer guarantees rapid browning but risks burning and sticking. To get it right, aim for a uniform distribution of the hash across the pan.
Spread the mixture evenly so that each part has direct contact with the hot surface, promoting consistent crispiness. Maintaining an even layer allows the heat to transfer uniformly, avoiding soggy spots or burnt patches.
By controlling layer thickness and ensuring uniform distribution, you maximize crispiness, creating that ideal crunchy exterior with a tender interior.
This attention to detail helps you achieve a consistently crispy corned beef hash every time you cook.
When and How Should You Flip the Hash for Maximum Crunch?
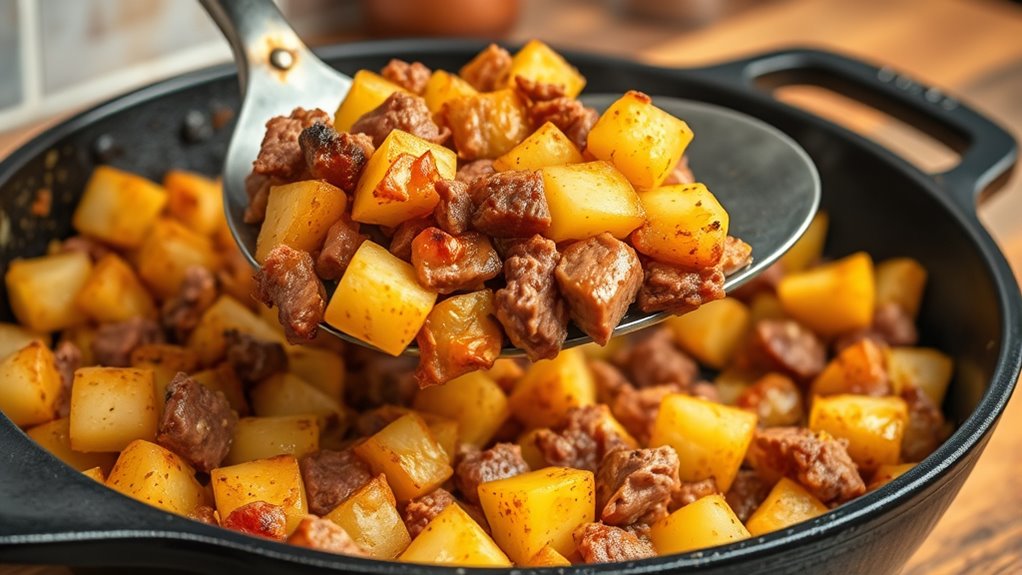
Timing is everything when flipping your corned beef hash to get that maximum crunch. Wait until the bottom is a deep golden and crispy before carefully sliding a spatula underneath. Usually, this takes about 4-5 minutes on medium-high heat, but keep an eye out for bubbling and firm edges. When it’s ready to flip, do it all at once for even crispiness.
To flip your hash smoothly, use a wide spatula to support as much surface area as possible. Gently lift and turn the hash in one confident motion. Press down lightly afterward so the crispy layer can meld together.
For the best experience, pair your crispy hash with lively music that boosts breakfast vibes. Complement it with your favorite breakfast beverages, whether that’s hot coffee or a glass of fresh juice. This makes each bite even more satisfying and enhances that perfect crunch.
How to Add Vegetables and Flavor Enhancers to Your Hash
Adding fresh vegetables is a great way to instantly boost the flavor and texture of your hash. Think about tossing in some juicy bell peppers, crunchy carrots, or tender zucchini—these can really bring your dish to life.
And don’t forget to spice things up with herbs and spices! A little thyme, rosemary, or paprika can make a huge difference and add that extra punch of flavor. Playing around with different seasonings lets you create a hash that perfectly matches your taste buds.
Fresh Vegetables Boost Flavor
Have you ever wondered how a few fresh vegetables can boost the flavor of your corned beef hash? Adding fresh veggies brings brightness and texture, making your dish more appealing.
Seasonal variations and cultural influences matter a lot when choosing the right produce. In winter, root vegetables like carrots and parsnips add sweetness, while in summer, peppers and zucchinis lend crunch and freshness.
To get the most flavor, try mixing colorful vegetables like diced bell peppers, chopped green onions, or shredded carrots. They boost visual appeal and bring natural sugars and crunch to balance the savory meat.
Feel free to adjust your veggies based on your cultural influences. Mexican, Asian, or European flavors each add a unique twist that transforms your hash beyond simple ingredients.
Herbs and Spices Elevate Taste
Herbs and spices can dramatically improve the flavor of your corned beef hash, transforming simple ingredients into a flavorful dish. To boost taste, experiment with herb combinations like thyme, parsley, and rosemary, which add freshness and aromatic depth.
Spice blends such as smoked paprika, black pepper, and cumin can lend a savory, smoky kick. Sprinkle these seasonings during cooking, especially when frying the hash, to help the flavors meld and create a crispy exterior.
Use fresh herbs for vibrant brightness or dried ones for concentrated flavor. Don’t be afraid to customize your spice blends to match your taste preferences. Properly seasoned, your hash will become much more than basic — it’s a rich, flavorful, and aromatic breakfast or meal centerpiece.
Troubleshooting: How to Fix Soggy or Burnt Hash
If your hash ends up soggy or burnt, don’t worry—it’s usually just a matter of how you’re controlling the heat and cooking time. To fix sogginess, try keeping the heat at a moderate level and cook it a little longer. This way, any extra moisture can escape and you’ll get a better texture.
On the flip side, if your hash is burnt, the key is to turn the heat down. Once you notice it starting to burn, remove it from the burner right away. That way, you can prevent it from scorching and ruining the whole batch.
Prevent Sogginess
To prevent sogginess, it’s essential to avoid overcrowding the pan, which traps moisture and makes the hash steam instead of crisping up. Use proper cooking techniques like spreading the hash evenly and allowing space for air circulation. When working with ingredient variations, choose drier ingredients or drain excess moisture to keep things crispy.
To further ensure crispy hash, consider these tips:
- Cook in batches if needed instead of crowding the pan.
- Use high heat to promote quick searing and prevent moisture buildup.
- Pat ingredients dry with paper towels before adding to remove excess liquid.
These steps help you get that perfect crispy texture and stop your hash from turning soggy. Using the right method and managing ingredients properly are key to consistent, crispy hash.
Control Heat Levels
Controlling heat levels is key to getting the perfect corned beef hash without ending up soggy or burnt. If the heat’s too high, the hash burns or overcooks quickly. If it’s too low, it can turn out mushy. Use a suitable pan—cast iron is ideal for even heat and nice crispiness.
Adjust the heat based on how your pan responds, and don’t try to rush things. A heavy, well-heated cast iron pan works best, so keep it heated evenly. Keep the seasoning simple and use minimal oil to enhance the flavor and get that crisp texture.
Avoid non-stick pans if you want crispiness, as they don’t give you that same crunch. Keep the heat moderate for better control and adjust it as needed to prevent burning. Using thin layers on the pan helps cook everything evenly.
Respect the seasoning timing for the best results too. Proper heat control makes all the difference in getting crispy, delicious corned beef hash every time.
Proper Cooking Time
Cooking corned beef hash for the right amount of time is essential to avoid sogginess or burning. If you cook it too long, it can develop a charred crust but risk burning, ruining both flavor and texture.
Conversely, cooking it too briefly can leave the hash limp and soggy, losing that crispy goodness you’re aiming for. To fix sogginess, try increasing the cooking time slightly and press down on the hash to release excess moisture.
This also enhances the hash’s nutritional benefits by making it more digestible and flavorful. For burnt hash, reduce the heat and remove any burnt bits quickly to prevent further damage.
Remember, hash originated as a hearty, economical dish. Proper timing helps preserve its flavor and nutritional value.
Keep these tips in mind:
- Use medium heat for even cooking
- Cook until edges are golden brown
- Adjust cooking time based on pan thickness and heat level
Creative Ideas for Serving Your Crispy Corned Beef Hash
Once you’ve nailed the crispy corned beef hash, it’s fun to get creative with how you serve it. Presentation can turn a simple dish into a stunning breakfast or brunch. Try arranging the hash in a ring mold or on a colorful plate to make it more eye-catching.
To switch things up, top your hash with a perfectly cooked fried egg. This adds both flavor and a great visual touch. You can also serve it alongside smoked salmon or crispy bacon strips for extra richness and protein.
Adding fresh herbs like parsley or chives brings vibrant color and fresh flavor. For a southwestern vibe, top the hash with sliced avocado and a drizzle of hot sauce. Whether as a main or a side dish, these ideas will make your crispy corned beef hash a memorable and beautiful meal.
How to Store and Reheat Leftovers for Crispy Hash
After putting all that effort into making your crispy corned beef hash look beautiful and taste fantastic, it’s natural to want to enjoy leftovers later. To keep that crispiness, store leftovers in an airtight container in the fridge within two hours of cooking. When reheating, aim for techniques that restore crunch and preserve flavor combinations.
To reheat and maintain that crispy texture, use these tips:
- *Skillet reheating:* Reheat in a hot skillet with a little oil, flipping occasionally to re-crisp evenly.
- *Avoid the microwave:* It can make the hash soggy and limp, ruining the texture you worked so hard for.
- *Add fresh seasonings:* To revive flavor, sprinkle a little garlic powder or a dash of paprika before reheating.
Final Tips for Maintaining the Perfect Crunch
To keep your corned beef hash irresistibly crispy, focus on how you handle leftovers and reheating. Use the right kitchen tools, like a non-stick skillet and a spatula, to prevent sticking and ensure even cooking.
When reheating, avoid overcrowding the pan because it traps moisture and can make the hash soggy. Instead, cook over medium-high heat and press the hash down slightly to promote contact with the pan.
For extra crunch, try finishing with a quick broil to crisp the top further. Pair your hash with fresh herbs or a squeeze of lemon to boost the flavor without making it soggy.
Frequently Asked Questions
Can You Use Homemade Corned Beef Instead of Canned for Crispy Hash?
Yes, you can use homemade corned beef instead of canned for crispy hash. Both work well, but homemade tends to be firmer and has a richer flavor.
To get that perfect crispy hash, cube your homemade corned beef and cook it over medium-high heat until it’s nicely browned. Keep in mind, homemade might need a bit more time to get that crispy texture like canned corned beef.
What Types of Oil Work Best for Achieving Maximum Crispiness?
For maximum crispiness, choose oils with a high smoke point like vegetable, canola, or grapeseed oil. These oils can handle high heat without burning.
Use enough oil to coat the pan evenly. That helps with even browning and prevents sticking.
Remember to season your hash well beforehand. When frying, let it sit undisturbed to develop that perfect crispy crust.
Adjust the heat as needed, and you’ll get a delightful, crispy hash every time.
Is It Better to Cook the Hash Covered or Uncovered?
Cooking your canned corned beef hash uncovered is better because it allows moisture to escape and helps it get crispy through better caramelization.
Using this method enhances the flavor by giving your hash a nice crunch and a richer taste. Keep the heat at medium-high and don’t cover the pan during cooking.
This encourages even browning and maximizes both texture and flavor, making your hash irresistibly crispy every time.
How Does the Size of the Pan Influence Crispiness?
Think of a wide skillet as a stage for perfectly crisped hash, where its big surface area touches more heat. A larger pan helps cook everything evenly, giving you that nice, uniform browning and crunch.
On the other hand, a smaller pan concentrates heat, so the edges can crisp up quickly. But watch out—it can also lead to overcrowding, which might cause steaming instead of frying.
Choosing the right pan size is key. It’s all about balancing heat flow to get that golden, crispy perfection without sacrificing that satisfying texture.
Can You Make Crispy Hash in the Oven Instead of on the Stove?
Yes, you can make crispy hash in the oven instead of on the stove. Just spread the canned corned beef hash evenly on a baking sheet.
Then bake it at a high temperature, around 400°F (200°C). For that crispy texture, flip or stir it halfway through.
This method helps with even browning and gives you that satisfying crunch without needing to stand at the stove.
Conclusion
Now that you know the secrets to crispy canned corned beef hash, you’re all set to master this delicious dish. Just remember, patience is key, and don’t rush the process. Good things come to those who wait.
With a little practice, you’ll have your hash perfectly crunchy and ready to enjoy. So, get cooking and turn this simple pantry staple into a breakfast winner. This crispy corned beef hash is sure to hit the spot every time!